Showing posts with label Art by Michael Mitchell. Show all posts

Sunday, December 29, 2013

Animal watercolor: portrait of a cat

I created this painting of our pet cat for a Christmas gift for my daughter. I think the most challenging part of the process was getting our cat to sit still long enough to get a photo of her! Once I had the photo, I worked directly from the photo to create the painting. To create the  texture of the fur I added some white back in. I love the eye color that I got. It really captures her actual eye color. I am always challenged with mixing accurate colors. Working with landscapes, nature colors are much more forgiving, while portrait colors are not.  The rest of the cat's coloring was easy since it is just black and white!
This will probably be the first of many animal paintings....

Sunday, September 22, 2013

Watercolor of wine grapes

A friend of mine had a birthday coming up and one of the things he loves is vineyards, grapes, anything to do with wine. And it's that time of year...Crush! I had seen a painting at an art studio a while back that inspired me to create something similar. With the help of Google Images, I had an image as a starting point and went from there.
Since this was going to be a framed piece, I actually worked backwards so it would fit in an existing 11x14 frame I had with a 1/4 inch border since it did not have a mat. With a little measuring and remeasuring (Why do they make 11x14 sized pads of paper 11x15?) I got the painters tape laid out for the correct size painting. I usually work outside but since I was inside, I had to pull out the blow dryer several times just to get the paint to dry so I could move on...waiting for paint to dry if not one of my strengths!

Here is the finished piece, framed and ready to go!

Sunday, September 15, 2013

Practicing Portrait Painting at Patris Studio

It's been a long time since I've done a portrait with watercolor. Patris Art Studio offers a model to draw each 2nd Saturday and I hadn't been there since i did model painting in January. The most challenging part of this was finding a good flesh tone. I started with her left arm, but it was way too jaundice looking.  So I adjusted it and tried the other arm which was much closer to her coloring. Of course after mixing yellow, red, and a couple other washes I had on my palette, I don't know if I could recreate it.
The 3/4 face view is the most challenging for me so I made sure that I set up my easel in the perfect spot. It turned out pretty good, but it is very stiff. I definitly will need to keep working on loosening up.


Saturday, August 24, 2013

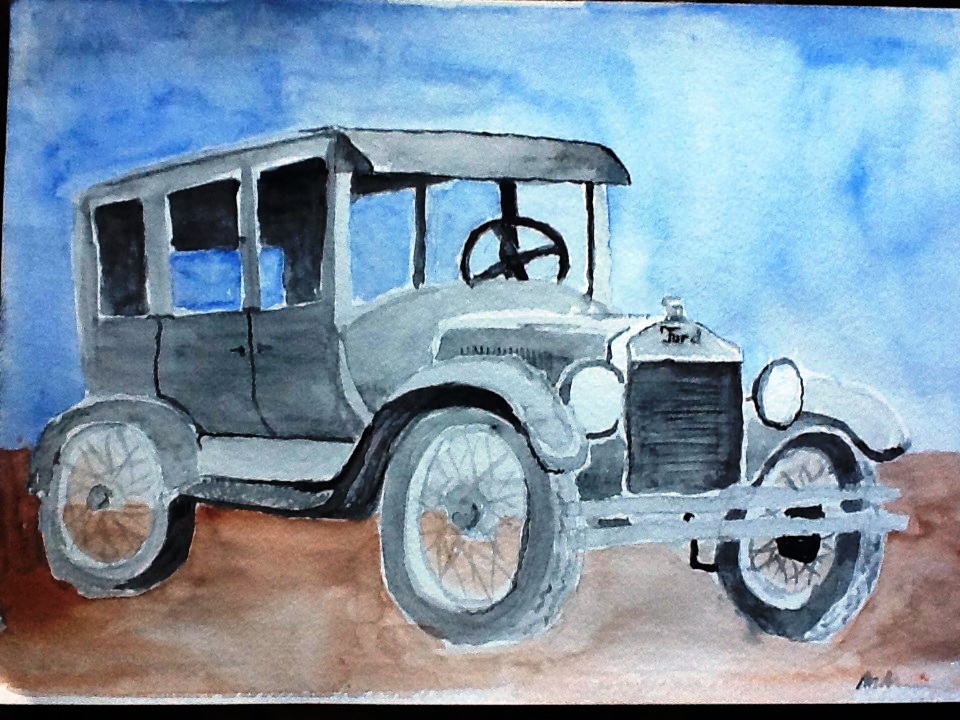
Watercolor Painting of Model T Ford at the California Auto Museum

Painting cars has never been something that I have done much of since my goal is to be out in nature as much as possible, but I was invited to a Plein Air meet-up at the California Auto Museum and decided it would be a good challenge. Martha Esch, the host of the event, had arranged for our "payment" into the museum to be a quick sketch on a note card to be donated to the museum. What an awesome idea! Of course my quick sketch ended up taking me almost 30 minutes.

It was quite an honor being able to go inside the museum to paint, as long as we didn't spill or clean our brushes like Bob Ross ( ha ha!) There are so many great cars there from a Delorean to a Dodge Pacer. The cars are placed close together though so it was hard to get a good spot to paint. I found a Model T that was in a nice quiet corner. The museum lighting was the hardest part to work with. The model T had a flat finish so reflection was minimal. But then determining how much detail to add or omit was challenging as well. Overall I think it turned out well.

Check out more sketches from this trip to the California Auto Museum here.

Monday, August 19, 2013

Plein air painting at Pinecrest Lake

Can't beat being at the beach, in the mountains, and painting simultaneously! Pinecrest Lake never fails to disappoint...
I love painting the water but I'm still trying to figure out how to best represent the ripples on the water...

Friday, August 2, 2013

Pencil drawing at camp

While being a camp counselor at Camp Celiac for a couple weeks, it was nice to be able to sneak away for a while to be creative. Not knowing how much time I was going to have, I stuck with pencil, which always makes for quick set up and clean up.  Landscape drawing with pencil is always challenging because I have to get creative determining what shade to give to different colors. I sketched this plein-air and then later, snapped a photo of the scene with my phone.  I think it turned out quite accurate to the scene...not as much artistic licence as I have taken in the past! I need to work on not smearing as I drag my hand across my work.


Sunday, July 21, 2013

Plein air painting at the pond fountain at Land Park

So I finally get outside to do some plain air painting with our Plein Air Meetup group, and its 106 degrees out! I wonder why only a couple of us showed up? It actually didn't feel too bad in the shade next to the water. I was working with some new paints today that are much better quality than the $5 set of twelve tubes I was working with before. The tricky part is that there are only 5 colors...it just lends for more practice color-blending. They are made with a honey base so they have more brilliant color and don't dry as fast on the palette ( that was particularly important on a hot day like today).
I'm still trying to figure out the reflection and ripple effect that is created by water, so I keep challenging myself with it. My last attempt was at Hagan Park and today I'm at Land Park.  I started at the top with the sky and worked my way down with the trees and grass, and finishing with the pond.  I "cheated" a little bit because I used white paint to create the water spray (most watercolorists would say to use the white of the paper instead but without masking fluid, it just wasn't going to work). Although there were a couple other people painting, I was so totally focused, I probably wasn't very good company.

Monday, July 15, 2013

Watercolor of the sea and sky

So being summertime, I thought I would be out plein air painting regularly. But when it's 100 degrees outside, I find myself hiding inside finding art to "copy" in my own style. Here is my most recent imitation.
 "Plage de la Fontaine" (2013)
Original Watercolor by Alisa Laporte
Size 9 1/2 in by 3 7/8 in

Chinese style painting


I saw this art hanging on the wall at P F Changs and really liked the look of it so I thought I would recreate it myself.
So I used only black watercolor, instead of ink, to create the waterfall scene. As I painted, the scene developed into something quite different that the original picture. The original picture had more than just black ...but I decided to keep to just the monochromatic theme. I couldn't figure out how to put blossoms on the tree so it just looks like a dead tree.  The placement of the tree seemed so effortless in the original picture, but in mine it seems a little awkward. I added a mountain and a second waterfall to fill in the background.  And then trying to capture the movement of the water was a challenge, but overall I think it turned out well, but definitely with my own flare!

Friday, May 31, 2013

A bridge at Hagan Park

So while I was plein air painting the pond at Hagan Park, I decided to take some pictures to see if I could be further inspired later on. The idea of taking a picture and then going home and painting inside, like most painters do, has always been a struggle for me. Why? I don't know, but there is something about painting a scene that is right in front of you that always seems to inspire me...especially in this beautiful Sacramento weather we are having! So this was painted entirely inside. The biggest advantage that I found to painting inside from a photograph is that I don't having a rushed feeling, leaving more time to let things dry. This has always been a problem for me...having the patience to let one area dry before going to the next.

I really worked on leaving negative spaces on this piece...no masking fluid used (I still have to get some of that so I can figure it out). The bridge kind of reminds me of  Monet's Bridge Over a Pond of Water Lilies.

Plein air painting at the pond in Hagan Park, Rancho Cordova


I was out at Hagan Park this week, looking for some insiration to paint, with my new stool and easle that I had gotten for my birthday. Whenever I am here I always think about the large pond but never made the time to sit down and paint it, until now! The pond is always smooth and reflective, so I challenged myself with treating the reflction a little different than I  usually do when I am out painting the river. I quite like the texture that it created in the painting! The idea of painting vertically instead of having the painting pad on my lap was tricky to get use to.  It is suppose to help the paint flow better, but I guess it takes some getting use to.
It's kind of intimidating looking at the photograph right next to my painting, but I think I did a pretty good representation of the scene.

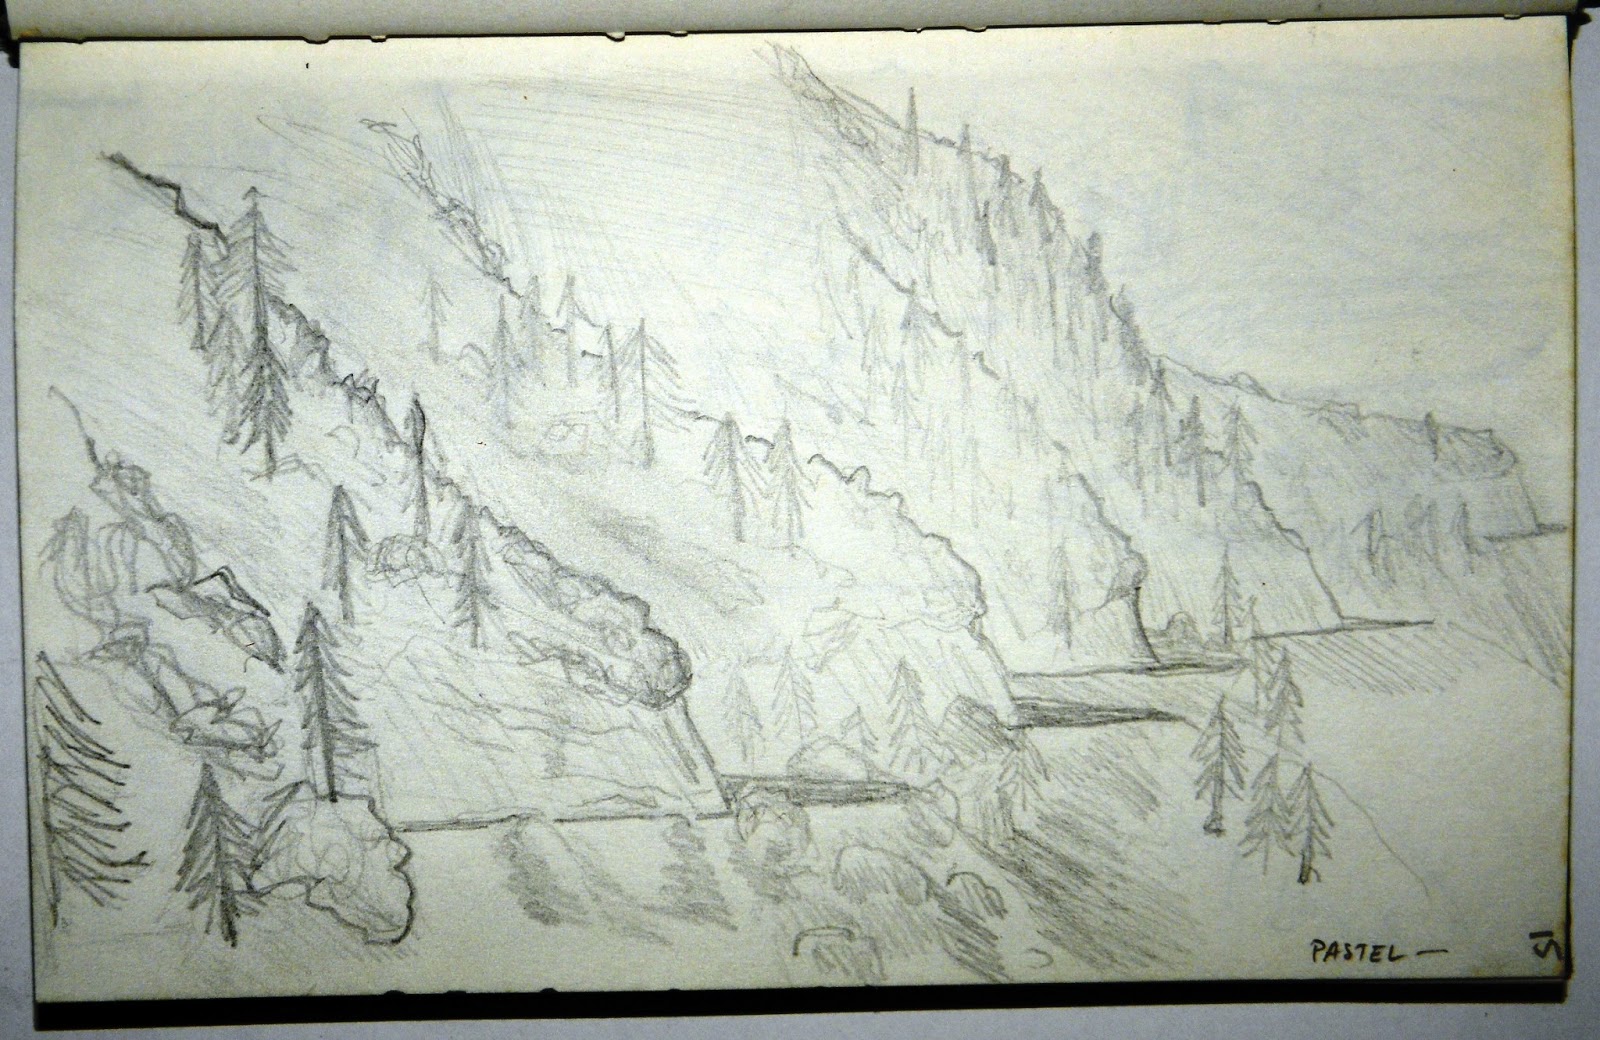
Old pencil drawings from my sketchbook

Here are some old drawings I had found in my sketchbook.  The first one is somewhere in the mountains above Los Angeles. I must have done it about 25 years ago! I think my original plan was to re-do it in pastel.
A little more recently, 2007, is a sketch of American Canyon Falls, outside of Cool, CA. I guess I was wrong in my Black Hole of Calcutta Falls blog entry when I said I had never drawn a waterfall before...

Colored Pencil Sketch of Miner's Ravine

This was just a beautiful, and relaxing scene just as the sun was setting behind me and the sky was turning all kind of deep blue. The lighting just couldn't be captured with my camera, being a point and shoot where it "tries" to adjust to the optimal lighting but instead washes out all the nuances of color. I was sitting on the edge of the Miner's Ravine greedbelt avoiding the hustle and bustle of Roseville, watching the evening walkers and bicyclists going by, while being serenated by the red-winded blackbird flitting about the reeds in the marsh below me. It's no wonder I love plein air art SO much!

Sunday, May 26, 2013

Cardboard, glue, and foil...simple enough for kids, but fun for adults, too!

So here is another creation inspired by a Pinterest post. You seemed to enjoy the last one on Baby Wipe Painting! This one comes from a blog called Make It...a Wonderful Life. Our Artist Way group chose this project to work on to help us get creative though different mediums. It was a two step process. The first step was to create a basic design using glue onto a piece of cardboard. From our experience, chip board works better than corragated because the corragated pattern comes through on the completed product. I also found that the "basic design" is all relative because even small details come through in the end.  I used a toothpick to feather some of my glue lines. Sorry I didn't take a picture of the completed first step.

After the glue has dried completely, cover the cardboard with foil. Either the shiny or matte side works. For my project I used the matte side of the foil. Tape the back to keep the foil from moving around. Using your fingers or cotton swabs, rub the foil until the design from the glue comes through on the foil. Then you can add in more details with a pointed object like a pencil (Not too sharp as to puncture the foil though). This will add in some texture that wasn't possible with the glue.

Last, we put shoe polish on and rubbed it around to give it an antique look. It was hard  to work with the shoe polish and it didn't move around as well as I wanted it too, but it does help accentuate some of the details.

Photograghing this piece was a challenge because of the reflective surface, but you can get an idea of the detail  work as well as the areas left smooth.

Wednesday, May 22, 2013

Plein Air painting at I -Fest in Rancho Cordova

Here is a step-by-step look at me painting plein air at the Rancho Cordova I-Fest, a display of the city's international diversity. The Sacramento Plein Air group was invited to document the event.
I started with a rough outline with an Expo dry erase pen,
and then washed in sky and began working on the background.
Working my way down, adding in more background.
Filling in the foreground.
Add in shadows.
A few minor details... and voila!

This was a very challenging project because I have always avoided drawing people, and here was a huge crowd! Also thought I'd throw a dog in there just for sport! Here is my "almost complete" artwork displayed next to David Peterson's work.


Artist at work.
I forgot to give my wife credit for the photos.  I was too busy to even notice that she was taking them, but it worked out well for showing the steps. Thank you Joann!


Friday, April 19, 2013

Baby Wipe Painting

I'm always willing to try new things.  A friend of mine from my Artist Way group told me of this process of applying paint with baby wipes of all things. "Forget the brushes!" I thought, "Let's give this a try!" On a 3/4 inch thick piece of plywood (8 in x 10 in) I used the baby wipe to apply two different colors of acrylic paint. and within 5 minutes, I had created a sunset (or I suppose it could be turned upside-down for a sunrise).  The moisture of the wipe helped spread the paint on the untreated wood.  The grain still shows through to give it that ethereal look. I also applied paint to the sides of the board for a more completed look without a frame.


Marsh Creek

I finally broke down and bought a new paint brush. I started with my $5 set of 10 brushes from Michael's, and now I went back and bought a pointed round brush for $5. Still a far cry from the hundreds I could spend on brushes.  This new brush is very versatile. I completed this painting using just the one brush, from wash to detail work

I found a nice quiet spot in between Clayton and Brentwood off Marsh Creek Road.  Had to hop a couple of fences to get to down to the creek but well worth the hike. I love the rolling grassland in the area with majestic oaks scattered upon the hillsides. It was a great day with big puffy clouds and I was just far enough from the road that the only sound was the gurgling brook.

Wednesday, March 27, 2013

Black Hole of Calcutta Falls

Black Hole of Calcutta Falls:  Sounds like a crazy name for a waterfall, and it wasn't that spectacular, but it was a quiet shady spot with charm. I decided to just use pencil instead of using watercolors, but I might be inspired to do a watercolor later.  Pencil seemed easier when I started, but there are so many subtle shades and colors.  And the water cascading over black rocks...quite a challenge.
I love waterfalls but realized that I had never painted (or drawn) one before.  The water splashing over the rocks is unique compared to the slow moving river that I have been working with. 


Monday, March 25, 2013

The Oak within the Acorn

A quick colored pencil sketch inspired by a talk at Clarity Academy of Spiritual Arts by Dr. Kim, about how the potential of the acorn to become a great oak is within all of us!
Check out the new entry, "Potential", the oak within the acorn, revisited and renamed.

Sunday, January 27, 2013

Bridge over the American River

Today was such a beautiful day in Sacramento, I just had to get outside.  I've been cooped up inside because of rain or just being to cold to go out. (Ha, ha! I know I'm talking low 50's here. I'm just spoiled with California weather)  I have just been trying to get over this creative block that prevents me from even getting started.  But the good part of this is that I'm actually caught up on my blogging and I actually did this TODAY! (Not last month or a couple of weeks ago like I normally start) 

 It has been a while since I was out painting along the American River, but I am drawn to this peaceful strip of land amidst the hustle and bustle of Sacramento.  The Watt Avenue Bridge is one of those spots that the two converge.  I particularly liked the pattern of light and dark created by the support beams, and especially the triangles of afternoon light formed by the sun peeking under the bridge.
I've been working on different techniques such as mixing the color directly on the paper and using a dry brush. I like the way the dry brush strokes on the bottom left created the appearance of the sun shimmering off the rapids in the water.  I'm still working on being patient enough to let areas of the painting dry before laying down the next layer. Sometimes the resulting "bleed" creates a nice effect, like the trunk of the tree on the left. Other times its not so good (under the middle of the bridge).  I also feel there are some perspective issues on the bridge...next time I will need to bring a ruler or straight edge to keep my lines and perspective straight!